영상·음성2026년 9월 3일· 31분 읽기
블렌더로 AI 영상 카메라 구도잡기
카메라 움직임과 타이밍은 블렌더에서 먼저 짜고 AI에는 겉모습만 입히는 3가지 방법이에요. 힉스필드 플러그인, 클로드 스크립트, 시댄스 실사화를 다뤄요.
AI 영상은 프롬프트만으로 카메라 움직임이랑 타이밍을 정확히 시키는 게 거의 불가능합니다. 차가 언제 피하고 언제 변신하는지 말로 설명하면 매번 다르게 나와요.
그래서 움직임은 블렌더에서 먼저 짜고, AI한테는 겉모습만 입히게 시킵니다. 이 가이드는 그걸 하는 세 가지 방법이에요. 강남 카체이스는 예시일 뿐이고, 이 방법으로 뭐든 만들 수 있습니다.
🗺️ 세 가지 방법이 하는 일
방법 | 하는 일 | 이럴 때 |
|---|---|---|
1. 힉스필드 플러그인 | 블렌더 안에서 씬 생성, 폰으로 카메라 조종, 영상 생성까지 | 코드 안 만지고 빠르게 |
2. 클로드 스크립트 | 클로드한테 말로 설명하면 블렌더 씬을 코드로 짜줌 | 움직임과 타이밍을 정확히 통제하고 싶을 때 |
3. 시댄스 실사화 | 블렌더에서 뽑은 회색 영상을 실사로 변환 | 1번이나 2번 다음 단계 |
보통 1번이나 2번으로 블록아웃을 만들고 → 3번으로 실사화하는 흐름입니다. 1번과 2번은 같이 써도 돼요. 씬은 클로드로 짜고 카메라만 폰으로 잡는 식으로.
1️⃣ 힉스필드 블렌더 플러그인
블렌더 안에서 힉스필드 모델을 바로 쓰는 방법입니다. 시댄스, 나노바나나, 3D 생성까지 뷰포트에서 돌아가요.
설치
Higgsfield 로그인 후 Plugin 탭 에서 Higgsfield Blender 설치
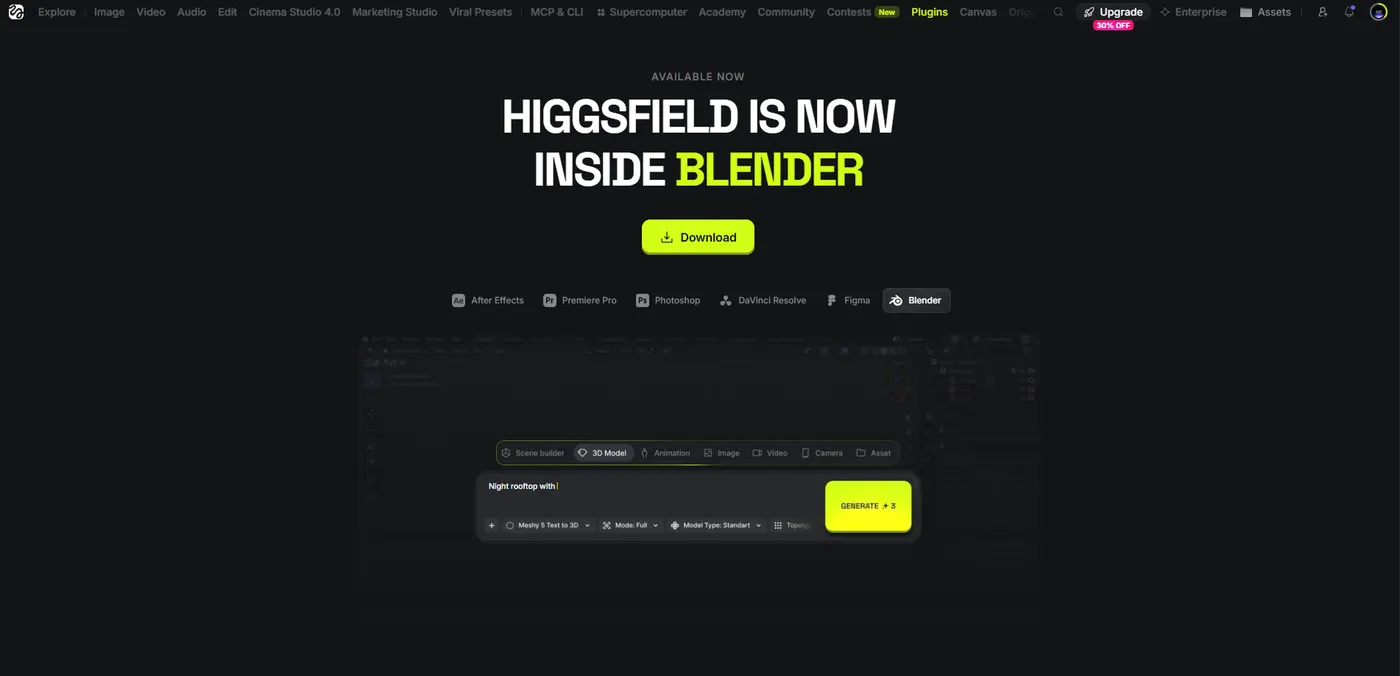
블렌더 열고 다운로드한 zip 파일 그대로 올리면 설치 완료
1분이면 끝납니다.
폰으로 카메라 조종하기
이 플러그인의 핵심입니다. 폰이 블렌더 카메라 컨트롤러가 돼요.
Higgsfield 탭에서 Camera를 켜고 폰을 연결하면, 폰을 들고 움직이는 대로 뷰포트 카메라가 따라옵니다. 렌즈 프리셋으로 화각을 고르고, 녹화를 누른 상태로 움직이면 그게 키프레임으로 들어가요.
손으로 잡은 카메라가 훨씬 자연스럽습니다
키프레임으로 짠 카메라는 기계처럼 매끈해서 AI 티가 납니다. 폰을 들고 실제로 움직이면 미세한 떨림과 반 박자 늦는 관성이 들어가서 실제 촬영처럼 보여요. 카메라만큼은 이걸로 잡으세요.
씬 만들기
Scene builder에 장면을 말로 설명하면 블록아웃이 생깁니다. 도로, 건물, 차, 사람 같은 회색 블록이 배치돼요. 3D Model에서는 프롬프트나 이미지로 텍스처 입힌 모델을 만들어 불러올 수 있고요.
영상 생성
Video 탭에서 뷰포트나 씬 카메라를 소스로 잡고 프롬프트를 넣으면 시댄스가 돌아갑니다. 3번 방법이랑 같은 건데 블렌더를 안 벗어나는 거예요.
생성 중에는 다른 프로그램 닫아두세요
뷰포트 그리면서 영상 생성까지 하면 메모리를 많이 씁니다. 제가 크롬, 포토샵 켜둔 채로 돌리다가 블렌더가 꺼진 적이 있어요. 그리고 씬 만들자마자 Ctrl S 저장부터.
2️⃣ 클로드로 스크립트 짜기
(힉스필드 플러그인이 잘 안될 경우)
카메라가 정확히 몇 초에 어디로 가야 하고, 어떤 사건이 몇 프레임에 터져야 하는지 통제하고 싶을 때 씁니다. 클로드한테 장면을 설명하면 블렌더 파이썬 스크립트를 써줘요. 붙여넣고 실행하면 씬이 생깁니다.
클로드한테 이렇게 시키세요
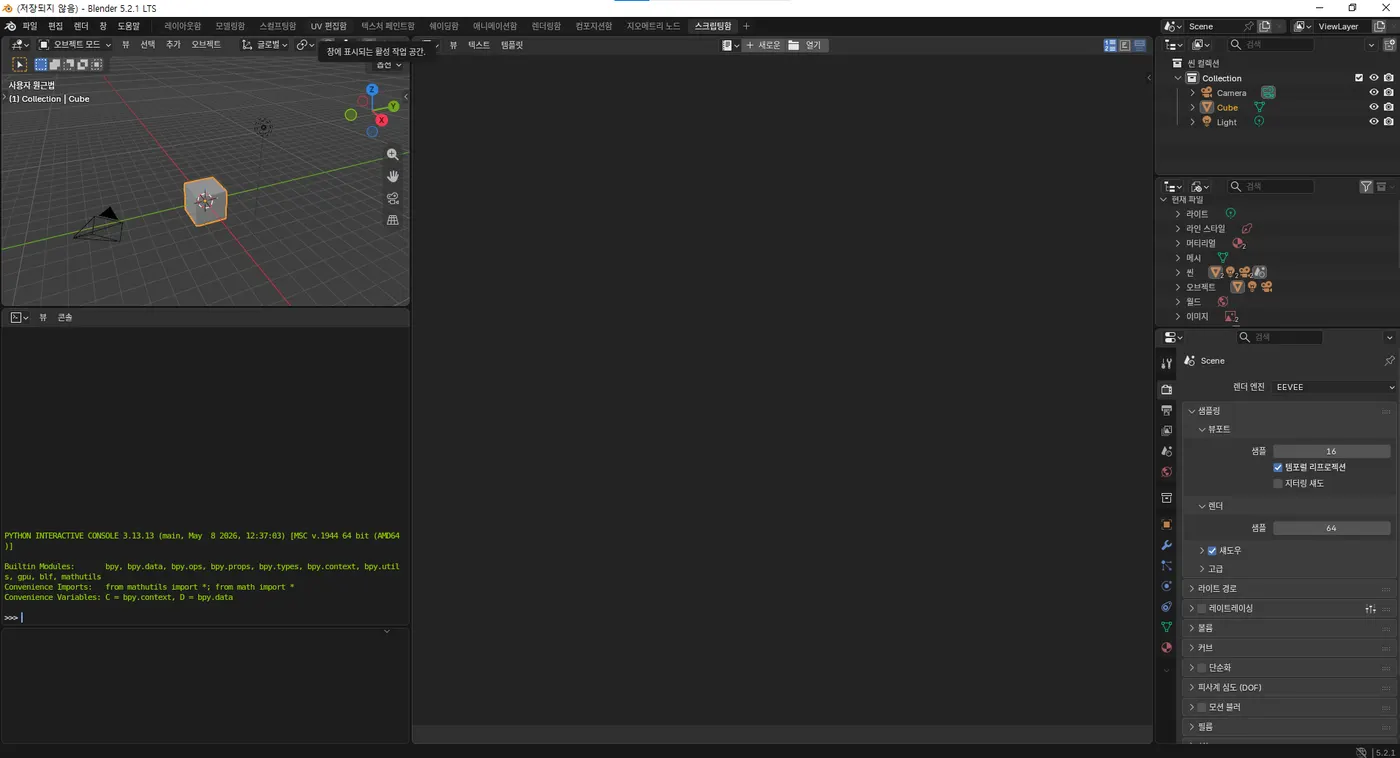
블렌더에서 상단 스크립팅함에서 클로드가 짜준 스크립트 파일을 붙여넣으면 됩니다.
블렌더용 파이썬 스크립트를 짜줘. 스크립팅 탭에 붙여넣고 실행하면 씬이 통째로 생기는 형태로.

## 장면 설명
- 어디:
- 무엇이 나오는지:
- 어떤 순서로 무슨 일이 일어나는지 (초 단위로):
- 카메라는 어디서 어떻게:
- 길이: 12초, 30fps
- 비율: 16:9

## 스타일
로우폴리 프리비즈. 텍스처 없이 회색 단색 블록으로. 워크벤치 렌더 엔진.

## 반드시 지킬 것
- 시작하자마자 기존 오브젝트 전부 삭제하고 새로 만들 것
- 카메라는 씬 카메라로 지정할 것
- 움직이는 물체는 이동 경로에서 머리 방향을 자동 계산해서 진행 방향을 보게 할 것 (옆으로 미끄러지지 않게)
- 사건이 일어나는 프레임 번호를 주석으로 적어둘 것
- 블렌더 5.x는 action.fcurves가 없으니 layers → strips → channelbag 경로로 접근하는 헬퍼 함수를 넣을 것
- 다 짜고 나서 어떤 숫자를 바꾸면 뭐가 달라지는지 표로 정리해줄 것
결과가 안 맞을 때
클로드한테 캡처를 보여주면서 뭐가 어색한지 말하면 됩니다. "차가 옆으로 미끄러진다", "카메라가 너무 흔들린다", "속도감이 없다" 같은 식으로요. 숫자 몇 개만 바꾼 새 스크립트를 줍니다.
제 경우 카메라 문제로 다섯 번 왔다갔다 했어요. 처음엔 완전 고정이라 뻣뻣했고, 다음엔 흔들림을 넣었더니 너무 역동적이었고, 결국 카메라 움직임을 세 번으로만 제한하는 걸로 정리됐습니다.
예시: 강남 카체이스 스크립트 (제가 실제로 쓴 것)
도로, 빌딩, 전봇대, 차, 사람, 스쿠터, 트럭, 카메라, 12초 애니메이션이 한 번에 생깁니다. 이걸 그대로 쓰라는 게 아니라 클로드가 어떤 형태로 짜주는지 참고용이에요.
import bpy
import math
import random

bpy.ops.object.select_all(action='SELECT')
bpy.ops.object.delete(use_global=False)

scene = bpy.context.scene
FPS = 30
END = 360
scene.frame_start = 1
scene.frame_end = END
scene.render.fps = FPS
scene.render.resolution_x = 1920
scene.render.resolution_y = 1080
scene.render.engine = 'BLENDER_WORKBENCH'
scene.display.shading.light = 'STUDIO'
scene.display.shading.show_cavity = True
scene.display.shading.show_shadows = True
scene.display.shading.color_type = 'MATERIAL'

world = scene.world or bpy.data.worlds.new('World')
scene.world = world
world.use_nodes = False
world.color = (0.55, 0.60, 0.68)

def mat(name, rgb):
    m = bpy.data.materials.get(name) or bpy.data.materials.new(name)
    m.diffuse_color = (*rgb, 1)
    m.roughness = 0.9
    return m

M_ROAD  = mat('road',  (0.55, 0.56, 0.58))
M_GROUND= mat('ground',(0.72, 0.73, 0.75))
M_WHITE = mat('white', (0.92, 0.92, 0.92))
M_CAR   = mat('car',   (0.95, 0.95, 0.95))
M_NPC   = mat('npc',   (0.70, 0.72, 0.75))
M_DARK  = mat('dark',  (0.12, 0.12, 0.13))
M_POLE  = mat('pole',  (0.70, 0.70, 0.72))
M_RED   = mat('red',   (0.85, 0.20, 0.18))
M_BLDG  = mat('bldg',  (0.62, 0.64, 0.68))
M_BLDG2 = mat('bldg2', (0.50, 0.53, 0.58))
M_GLASS = mat('glass', (0.42, 0.47, 0.55))

def box(name, loc, dims, m, parent=None, rot=(0,0,0)):
    bpy.ops.mesh.primitive_cube_add(size=1, location=loc, rotation=rot)
    o = bpy.context.active_object
    o.name = name
    o.scale = dims
    o.data.materials.append(m)
    if parent:
        o.parent = parent
    return o

def cyl(name, loc, r, depth, m, rot=(0,0,0), parent=None):
    bpy.ops.mesh.primitive_cylinder_add(vertices=12, radius=r, depth=depth, location=loc, rotation=rot)
    o = bpy.context.active_object
    o.name = name
    o.data.materials.append(m)
    if parent:
        o.parent = parent
    return o

def key(o, attr, frame, value):
    setattr(o, attr, value)
    o.keyframe_insert(data_path=attr, frame=frame)

def fcurves_of(o):
    ad = o.animation_data
    if not ad or not ad.action:
        return []
    act = ad.action
    if hasattr(act, 'fcurves'):
        return list(act.fcurves)
    out = []
    for layer in act.layers:
        for strip in layer.strips:
            cb = strip.channelbag(ad.action_slot)
            if cb:
                out.extend(cb.fcurves)
    return out

ROAD_LEN = 480
CY = 200
box('ground', (0, CY, -0.02), (260, ROAD_LEN, 0.02), M_GROUND)
box('road',   (0, CY,  0.00), (26, ROAD_LEN, 0.02), M_ROAD)
for side in (-1, 1):
    box(f'sidewalk_{side}', (side * 15.5, CY, 0.08), (5, ROAD_LEN, 0.16), M_WHITE)
for i in range(-20, 440, 4):
    box(f'dash_{i}', (0, i, 0.015), (0.12, 1.6, 0.01), M_WHITE)
CROSS_Y = 115
for i in range(-12, 13):
    box(f'cross_{i}', (i * 1.05, CROSS_Y, 0.015), (0.55, 3.2, 0.01), M_WHITE)
for side in (-1, 1):
    for i in range(-2, 33):
        y = i * 14
        x = side * 13.6
        cyl(f'pole_{side}_{i}', (x, y, 4.5), 0.14, 9.0, M_POLE)
        box(f'bar_{side}_{i}', (x, y, 8.6), (2.2, 0.16, 0.14), M_POLE)

def wire(name, x, z):
    cu = bpy.data.curves.new(name, 'CURVE')
    cu.dimensions = '3D'
    cu.bevel_depth = 0.025
    sp = cu.splines.new('POLY')
    ys = list(range(-28, 449, 14))
    sp.points.add(len(ys) - 1)
    for k, y in enumerate(ys):
        sp.points[k].co = (x, y, z, 1)
    o = bpy.data.objects.new(name, cu)
    bpy.context.collection.objects.link(o)
    o.data.materials.append(M_DARK)
    return o
for side in (-1, 1):
    for off in (-0.9, 0.0, 0.9):
        wire(f'wire_{side}_{off}', side * 13.6 + off, 8.75)

random.seed(7)
for side in (-1, 1):
    y = -60
    while y < 460:
        w = random.choice([14, 18, 22, 26, 30])
        d = random.choice([16, 20, 24])
        h = random.choice([18, 24, 30, 42, 55, 70, 90])
        x = side * (18 + d / 2)
        m = random.choice([M_BLDG, M_BLDG2, M_GLASS])
        box(f'bldg_{side}_{y}', (x, y + w/2, h/2), (d, w, h), m)
        if h > 30 and random.random() < 0.6:
            box(f'podium_{side}_{y}', (x - side*1.5, y + w/2, 3), (d + 3, w + 1, 6), M_BLDG)
        if random.random() < 0.5:
            box(f'roof_{side}_{y}', (x, y + w/2, h + 2), (d*0.4, w*0.4, 4), M_BLDG2)
        y += w + random.choice([2, 4, 6])
for side in (-1, 1):
    for y in range(-40, 460, 34):
        h = random.choice([80, 110, 140, 170])
        x = side * (18 + 24 + 20 + random.choice([10, 18, 26]))
        box(f'tower_{side}_{y}', (x, y, h/2), (22, 22, h), M_GLASS)

bpy.ops.object.empty_add(type='PLAIN_AXES', location=(0, 0, 0))
car = bpy.context.active_object
car.name = 'CAR'
body  = box('car_body',  (0, 0, 0.55), (1.8, 4.2, 0.7), M_CAR, car)
cabin = box('car_cabin', (0, -0.2, 1.15), (1.5, 2.0, 0.55), M_CAR, car)
wheels = []
for x in (-0.95, 0.95):
    for y in (1.35, -1.35):
        wheels.append(cyl(f'wheel_{x}_{y}', (x, y, 0.36), 0.36, 0.3, M_DARK, rot=(0, math.pi/2, 0), parent=car))
wing_l = box('wing_l', (-0.9, 0.1, 0.6), (0.05, 1.3, 0.08), M_CAR, car)
wing_r = box('wing_r', ( 0.9, 0.1, 0.6), (0.05, 1.3, 0.08), M_CAR, car)
tail   = box('tail',   (0, -1.9, 0.95), (0.08, 0.8, 0.05), M_CAR, car)

def npc_car(name, x, y0):
    bpy.ops.object.empty_add(type='PLAIN_AXES', location=(x, y0, 0))
    e = bpy.context.active_object
    e.name = name
    box(name+'_body', (0, 0, 0.55), (1.8, 4.2, 0.7), M_NPC, e)
    box(name+'_cabin', (0, -0.2, 1.15), (1.5, 2.0, 0.55), M_NPC, e)
    for wx in (-0.95, 0.95):
        for wy in (1.35, -1.35):
            cyl(name+f'_w_{wx}_{wy}', (wx, wy, 0.36), 0.36, 0.3, M_DARK, rot=(0, math.pi/2, 0), parent=e)
    return e
npc1 = npc_car('NPC1',  2.4, 30)
npc2 = npc_car('NPC2', -2.4, 62)

bpy.ops.object.empty_add(type='PLAIN_AXES', location=(4.8, CROSS_Y, 0))
person = bpy.context.active_object
person.name = 'PERSON'
box('p_body', (0, 0, 1.15), (0.5, 0.3, 0.8), M_WHITE, person)
box('p_head', (0, 0, 1.85), (0.32, 0.32, 0.32), M_WHITE, person)
box('p_leg_l', (-0.14, 0, 0.4), (0.18, 0.22, 0.8), M_WHITE, person)
box('p_leg_r', ( 0.14, 0, 0.4), (0.18, 0.22, 0.8), M_WHITE, person)

SCOOT_Y = 190
bpy.ops.object.empty_add(type='PLAIN_AXES', location=(-18, SCOOT_Y, 0))
scoot = bpy.context.active_object
scoot.name = 'SCOOTER'
box('s_body', (0, 0, 0.5), (1.6, 0.5, 0.3), M_RED, scoot)
box('s_box',  (-0.5, 0, 0.9), (0.6, 0.6, 0.5), M_RED, scoot)
box('s_rider',(0.1, 0, 1.2), (0.4, 0.4, 0.9), M_WHITE, scoot)
cyl('s_w1', ( 0.6, 0, 0.3), 0.3, 0.2, M_DARK, rot=(math.pi/2, 0, 0), parent=scoot)
cyl('s_w2', (-0.6, 0, 0.3), 0.3, 0.2, M_DARK, rot=(math.pi/2, 0, 0), parent=scoot)

TRUCK_Y = 330
bpy.ops.object.empty_add(type='PLAIN_AXES', location=(1.5, TRUCK_Y, 0), rotation=(0, 0, 0.95))
truck = bpy.context.active_object
truck.name = 'TRUCK'
box('t_trailer', (0, 0, 2.3), (2.6, 12, 4.4), M_NPC, truck)
box('t_cab',     (0, 7.2, 1.8), (2.6, 2.4, 3.2), M_DARK, truck)
for wy in (-4, -1, 5, 7.5):
    for wx in (-1.2, 1.2):
        cyl(f't_w_{wx}_{wy}', (wx, wy, 0.5), 0.5, 0.35, M_DARK, rot=(0, math.pi/2, 0), parent=truck)

bpy.ops.object.empty_add(type='PLAIN_AXES', location=(0, 0, 0))
cam_rig = bpy.context.active_object
cam_rig.name = 'CAM_RIG'
con = cam_rig.constraints.new('COPY_LOCATION')
con.target = car
con.use_z = False
bpy.ops.object.camera_add(location=(0, -7.2, 2.3))
cam = bpy.context.active_object
cam.name = 'CAM_chase'
cam.data.lens = 20
cam.parent = cam_rig
trk = cam.constraints.new('TRACK_TO')
trk.target = car
trk.track_axis = 'TRACK_NEGATIVE_Z'
trk.up_axis = 'UP_Y'
scene.camera = cam

SPEED_TOTAL = 408.0
def y_at(f):
    return (f - 1) * SPEED_TOTAL / (END - 1)
def car_xz(f, x, z=0.0):
    key(car, 'location', f, (x, y_at(f), z))

car_xz(1, 0)
car_xz(20, 0);  car_xz(36, -2.6); car_xz(50, 0)     # 20~50 앞차 왼쪽 추월
car_xz(62, 0);  car_xz(76,  2.6); car_xz(90, 0)     # 62~90 앞차 오른쪽 추월
car_xz(92, 0);  car_xz(102, -1.5); car_xz(116, 0)   # 92~116 횡단보도 급회피
car_xz(156, 0); car_xz(168,  2.6); car_xz(182, 0)   # 156~182 스쿠터 급회피
car_xz(240, 0, 0.0); car_xz(300, 0, 9.0); car_xz(END, 0, 24.0)   # 240~ 이륙

key(cam, 'location', 1,  (0, -14.0, 6.0))            # 오프닝 크레인 다운
key(cam, 'location', 60, (0, -7.2, 2.3))
key(cam, 'location', 90,  (0,   -7.2, 2.3))          # 급회피 때 옆으로
key(cam, 'location', 103, (2.0, -7.2, 2.3))
key(cam, 'location', 120, (0,   -7.2, 2.3))
key(cam_rig, 'location', 1,   (0, 0, 0))             # 이륙 때만 카메라 상승
key(cam_rig, 'location', 240, (0, 0, 0))
key(cam_rig, 'location', 300, (0, 0, 4.5))
key(cam_rig, 'location', END, (0, 0, 12.0))

for w, s in ((wing_l, -1), (wing_r, 1)):             # 200~250 변신
    key(w, 'scale', 200, (0.05, 1.3, 0.08));   key(w, 'location', 200, (s*0.9, 0.1, 0.6))
    key(w, 'scale', 250, (2.6, 1.3, 0.08));    key(w, 'location', 250, (s*2.1, 0.1, 0.6))
key(tail, 'scale', 205, (0.08, 0.8, 0.05));   key(tail, 'location', 205, (0, -1.9, 0.95))
key(tail, 'scale', 250, (0.08, 0.8, 0.9));    key(tail, 'location', 250, (0, -1.9, 1.35))
for w in wheels:
    x, y, z = w.location
    key(w, 'location', 215, (x, y, z));        key(w, 'scale', 215, (1, 1, 1))
    key(w, 'location', 242, (x, y, z + 0.4));  key(w, 'scale', 242, (0.05, 0.05, 0.05))

key(npc1, 'location', 1, ( 2.4, 30, 0));  key(npc1, 'location', END, ( 2.4, 150, 0))
key(npc2, 'location', 1, (-2.4, 62, 0));  key(npc2, 'location', END, (-2.4, 182, 0))

key(person, 'location', 1,   (4.8, CROSS_Y, 0))
key(person, 'location', 84,  (4.8, CROSS_Y, 0))
key(person, 'location', 100, (0.3, CROSS_Y, 0));       key(person, 'rotation_euler', 100, (0, 0, 0))
key(person, 'location', 108, (2.2, CROSS_Y + 0.6, 0)); key(person, 'rotation_euler', 108, (0, -0.45, 0))
key(person, 'location', 124, (3.0, CROSS_Y + 0.6, 0)); key(person, 'rotation_euler', 124, (0, 0, 0))

key(scoot, 'location', 1,   (-18, SCOOT_Y, 0))
key(scoot, 'location', 150, (-18, SCOOT_Y, 0))
key(scoot, 'location', 185, ( 18, SCOOT_Y, 0))

# 진행 방향에서 머리 각도 자동 계산 (옆으로 미끄러지지 않게)
locs = {}
for f in range(0, END + 2):
    scene.frame_set(max(1, min(END, f)))
    locs[f] = car.location.copy()
def smooth(vals, n=3):
    out = []
    for i in range(len(vals)):
        a = max(0, i - n); b = min(len(vals), i + n + 1)
        out.append(sum(vals[a:b]) / (b - a))
    return out
yaws, pitches, rolls = [], [], []
for f in range(1, END + 1):
    d = locs[f + 1] - locs[f - 1]
    horiz = math.hypot(d.x, d.y)
    yaw = -math.atan2(d.x, d.y) if horiz > 1e-6 else 0.0
    pitch = math.atan2(d.z, horiz) if horiz > 1e-6 else 0.0
    ax = locs[f + 1].x - 2 * locs[f].x + locs[f - 1].x
    roll = max(-0.07, min(0.07, -ax * 6.0))
    yaws.append(yaw); pitches.append(pitch); rolls.append(roll)
yaws, pitches, rolls = smooth(yaws, 2), smooth(pitches, 4), smooth(rolls, 4)
for i, f in enumerate(range(1, END + 1)):
    car.rotation_euler = (pitches[i], rolls[i], yaws[i])
    car.keyframe_insert(data_path='rotation_euler', frame=f)

body.keyframe_insert(data_path='location', frame=1)
for fc in fcurves_of(body):
    if fc.array_index == 2:
        mod = fc.modifiers.new('NOISE')
        mod.scale = 3.0
        mod.strength = 0.03

for o in (car, cam_rig, cam, person, scoot, wing_l, wing_r, tail, *wheels):
    for fc in fcurves_of(o):
        for kp in fc.keyframe_points:
            kp.interpolation = 'BEZIER'
for o in (npc1, npc2):
    for fc in fcurves_of(o):
        for kp in fc.keyframe_points:
            kp.interpolation = 'LINEAR'
scene.frame_set(1)
렌더 내보내기
출력 속성(프린터 아이콘)에서 파일 형식 FFmpeg 비디오, 컨테이너 MPEG-4, 코덱 H.264. 상단 렌더 → 렌더 애니메이션 (Ctrl F12). 워크벤치라 1분이면 끝나요.
렌더 창은 끝까지 두세요
중간에 닫으면 거기까지만 저장됩니다. 렌더 결과 창에서 화면이 엄청 확대돼 보이면 마우스 올리고 Home 누르세요.
3️⃣ 시댄스 2.5로 실사화
블렌더에서 뽑은 회색 영상을 레퍼런스로 넣고, 시댄스한테 "이 움직임에 겉모습을 입혀라"고 시키는 단계입니다.
Higgsfield Video → 모델 Seedance 2.5 → 렌더 영상을 레퍼런스로 → 길이와 비율을 레퍼런스에 맞춤.
Higgsfield 바로가기
프롬프트는 이 순서로 씁니다
순서 | 내용 | 왜 |
|---|---|---|
1 | 카메라와 촬영 스타일 | 맨 앞에 있어야 전체 룩이 잡힘 |
2 | 레퍼런스를 어떻게 쓸지 | 제일 중요. 아래 설명 |
3 | 장소와 시간, 날씨 | 배경 전체 |
4 | 회색 블록 하나하나가 실제로 뭔지 | 이걸 안 알려주면 엉뚱한 걸로 바꿈 |
5 | 사건 묘사 | 변신, 충돌, 폭발 같은 것 |
6 | 화질과 색감, 사운드 | 마무리 |
7 | 비율, 길이, 금지 사항 | 글자 금지, 로고 금지 등 |
레퍼런스 사용 지시가 결과를 갈랐습니다
처음엔 "레퍼런스 움직임을 정확히 그대로 따라라"고 썼더니 회색 블록의 뻣뻣한 움직임까지 복사해서 게임 화면처럼 나왔어요.
"레퍼런스는 타이밍과 구도 가이드로만 쓰고, 움직임은 실제 물리로 다시 만들어라"로 바꾸니까 차에 무게가 실리고 카메라에 관성이 생겼습니다. 이 문단을 꼭 넣으세요.
레퍼런스 사용 지시 (복사해서 쓰세요)
Use the reference video ONLY as a guide for timing, framing, layout and the order of events. Do NOT copy its stiff, keyframed, weightless motion. Re-render every movement with real world physics: objects have mass and momentum, vehicles rotate their nose before moving sideways and roll on their suspension, the camera has inertia and lags a fraction of a second behind sudden moves. Nothing moves in straight mechanical lines.예시: 강남 카체이스 프롬프트 전문
Cinematic action chase sequence, shot like a big budget car chase with a real camera car and a stabilized gimbal. Opens on a high wide crane shot of the boulevard, the camera sweeping down and pushing in behind the speeding car until it settles into a low chase position. During the crosswalk near miss the camera slides sideways to reveal the pedestrian past the car's flank, then returns. Otherwise a steady low tracking shot until the takeoff, when the camera stays low and tilts up to watch the jet climb away. Anamorphic lens, shallow depth of field, heavy motion blur on the road and passing buildings, long lens flares. Single continuous take, no cuts.

Use the reference video ONLY as a guide for timing, framing, layout and the order of events. Do NOT copy its stiff, keyframed, weightless motion. Re-render every movement with real world physics: the car has mass and momentum, it rotates its nose before it moves sideways, it rolls on its suspension into each swerve and settles back with a small rebound, the tires slip and squeal on the wet asphalt, the body dips under braking and squats under acceleration. The camera car has inertia too, lagging a fraction of a second behind sudden moves and catching up smoothly, with the tiny imperfections of a real operator. Nothing moves in straight mechanical lines.

SETTING: Teheran-ro in Gangnam, Seoul at golden hour, low sun blasting between the towers and throwing long shadows across the road. A wide multi-lane boulevard lined with dense high-rise office buildings in glass and grey concrete, their windows catching orange light. Overhead power lines between utility poles on both sidewalks. Korean storefront signage at street level, blurred and unreadable. Wet asphalt mirroring the sky, painted lane dashes and a zebra crosswalk, spray kicking up behind the tires.

THE CAR: a real modern white compact sedan, unbranded, no logos, no license plate, clean paint with sharp reflections sliding across the body.

THE OTHER CARS: two ordinary grey and black sedans ahead, driving slowly in their lanes, unbranded. The white car threads past them with real steering inputs, not lateral slides.

THE PEDESTRIAN: an ordinary Korean man in his thirties in a dark jacket, stepping onto the crosswalk, then flinching and stumbling back as the car whips past inches from him, his jacket blown by the passing wind.

THE SCOOTER: a red delivery scooter with a rear delivery box, ridden by a person in a helmet, cutting across the road from the left, leaning into the turn.

THE TRUCK: a large white box truck jackknifed diagonally across all lanes ahead, blocking the road completely, hazard lights blinking.

THE TRANSFORMATION, mechanical and sequential while still at full speed: the sedan's body panels split along hard seams and rotate outward with sparks and hydraulic motion. The doors fold back and lock into swept-back angular fighter jet wings with sharp trailing edges. The hood splits and slides forward into a pointed nose cone. The roof and windshield merge into a low tinted canopy. Twin air intakes open on the flanks. The rear bumper drops away to expose twin jet exhaust nozzles. The wheels retract into the underbody and bay doors close over them. When complete it reads clearly as a compact single-seat fighter jet in white with dark grey panel lines, not a car with wings attached.

Once extended the wings are completely rigid and motionless, never flapping, never bending. The jet ignites its afterburners with blue orange flame and shockwave rings, lifts off in a shallow smooth climb with real aerodynamic lift, wobbling slightly as it leaves the ground, clears the truck's roof by inches, and accelerates hard into the sky between the towers, leaving heat distortion and a vapor trail.

Photorealistic live action, high end blockbuster production quality, cinematic color grade with warm golden highlights and deep teal shadows, fine film grain, subtle chromatic aberration on the flares. Sound: roaring engine, tires screaming on wet asphalt, the pedestrian's shout, scooter engine passing, mechanical clanks and hydraulic hiss during the transformation, then a rising turbine whine and afterburner blast. No music, no dialogue.

Horizontal 16:9, 12 seconds. No text, no readable letters, no logo, no watermark.
🚨 제가 실패했던 지점들
증상 | 원인 | 해결 |
|---|---|---|
날개가 새처럼 펄럭임 | 프롬프트에 "접히는 날개"라고 씀 | 날개가 완전히 고정된 제트기라고 명시 |
차가 옆으로 미끄러지듯 움직임 | 머리는 앞을 보는데 몸만 옆으로 이동 | 스크립트가 진행 방향에서 머리 각도를 자동 계산하게 |
변신할 때 멈춤 | "급정거"라는 단어가 프롬프트에 있었음 | "속도 유지하며 회피"로 바꿈 |
카메라가 너무 흔들림 | 손떨림 노이즈 과다 | 카메라 움직임을 세 번으로만 제한. 폰 녹화로 잡으면 더 자연스러움 |
실사 결과가 게임 화면 같음 | 레퍼런스를 정확히 따라라고 지시 | 타이밍 가이드로만 쓰고 물리는 새로 만들라고 바꿈 |
블렌더가 렌더 중 꺼짐 | 메모리 부족 | 다른 프로그램 닫고, 저장부터 |
만들어보시고 결과물 DM으로 보내주시면 재밌게 보겠습니다 👀